Selenium Automates Browser. This means whatever we do as human on a website, including (not limited to) opening sites, browse through sites, click on buttons, fill forms etc can be done pragmatically.
How you want to use Selenium or how you want to use (Use case) completely depend on you. Two most important use cases might be:
- Automating Testing of Web page
- Automating administrative tasks that can be done through web
Following Topics are covered in this Article:
Introduction
Selenium Automates Web browsers. It comes in three different flavors
- Selenium WebDriver - for serious advanced regression testing and distributions. This needs knowledge of additional knowledge of any programming language like Python, Java etc.
- Selenium IDE - Repetitive Administration work or quick bug reproduction script.
- Selenium Grid - Advance Automation running on multiple Machines
We will cover Selenium IDE in this article. Same knowledge can be used as foundation knowledge to jump to Selenium WebDriver
Selenium IDE Installation
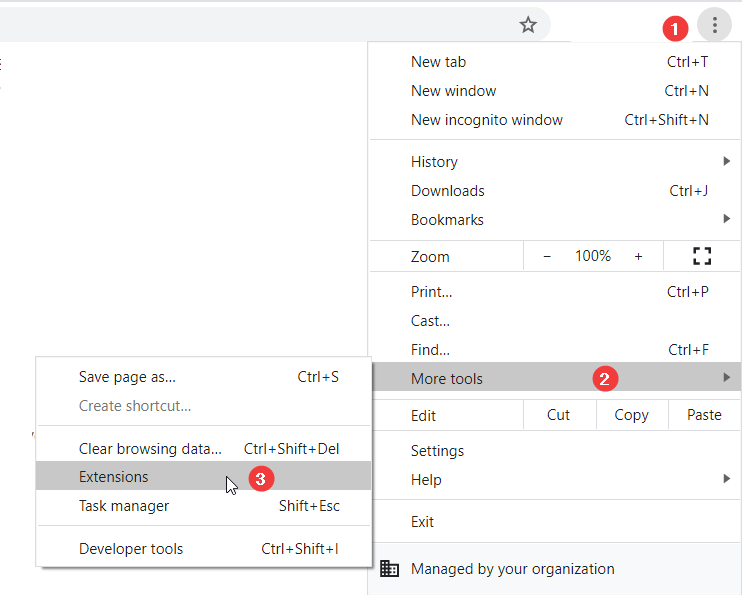
Selenium IDE comes as extension to Chrome or Firefox. You can do it by searching on the extension for Selenium IDE. Following is an example of chrome on where to search
First recording in Selenium IDE
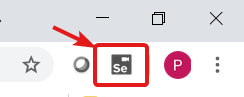
After you install Selenium, selenium icon should appear on the right top corner of the browser.
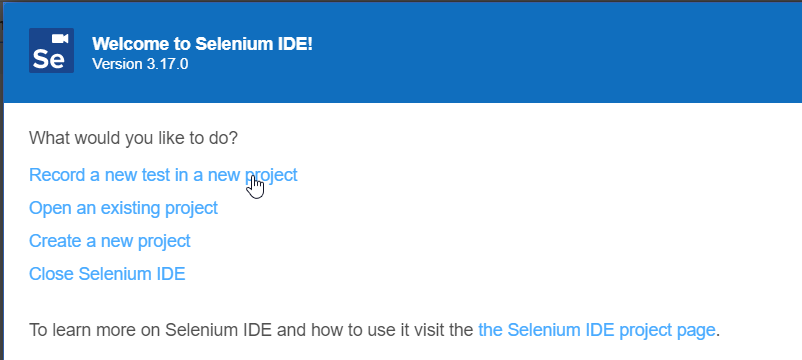
Clicking on the icon launches Selenium IDE. This will launch Selenium IDE splash screen as below
Did you notice the Record Button? That is our starting point. Selenium IDE supports recording steps we would take to do some activities on a web page. The same recordings can be played back again and again. After recording, it can be customized to remove some steps or modified. Steps can be added too.
Let us start with a New Project and name it as First Automation and click ok

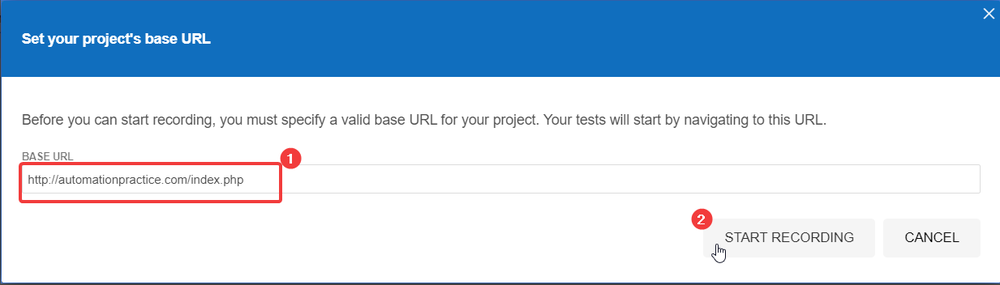
Next, you need to type in the base url. it must start with http:// or https:// . Recording button will not activated until the full url including https or http is given. I have given http://automationpractice.com/index.php in the url.
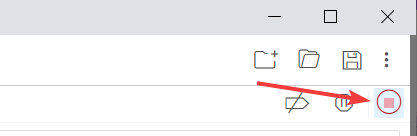
After you start the recording by clicking on the recording button, it will pop up a browser window opening the base url. Now, whatever action you do on the web page will be recorded as some code in Selenium IDE. Once you are done with your transactions or actions, Please go back to the Selenium IDE screen and click on the Stop recording button. I just did some actions on the http://automationpractice.com/index.php and saved my tests
Below you can see the commands that are recorded by Selenium
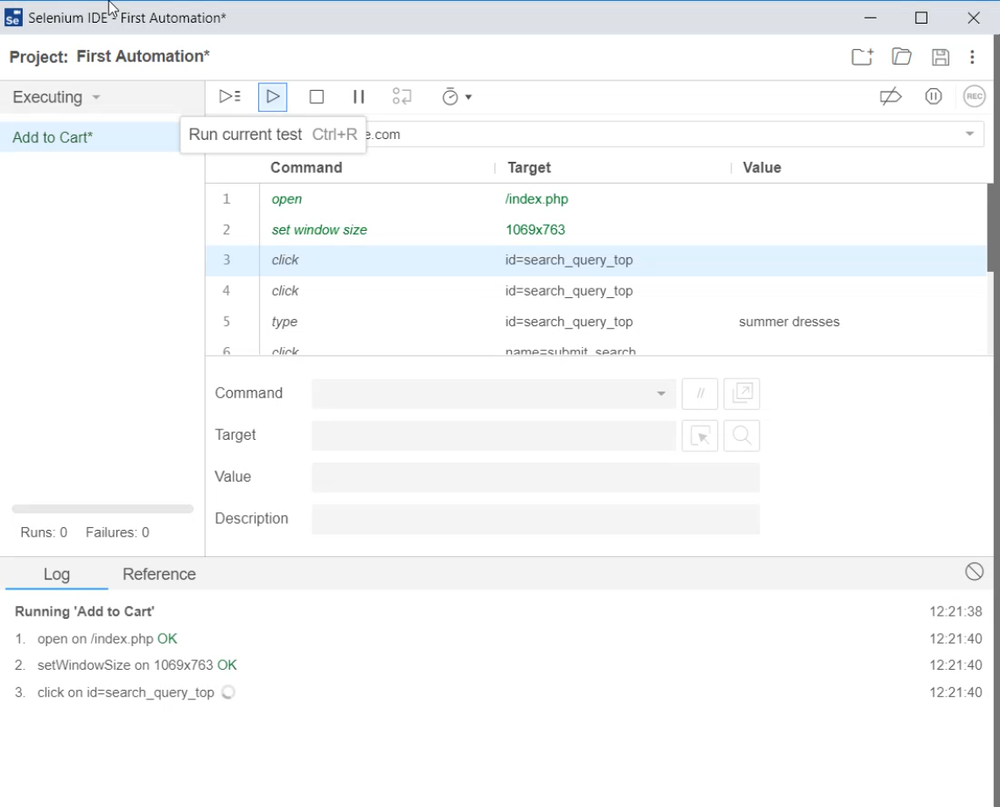
Clicking on the run button or pressing Alt+R will play the recording. Play recordings means. the Selenium will open web browser and do exactly that was done on the web page while recording. You can play small clip below showing the video recording of all the few click that I did on the site including adding a product to Cart
Playback of recording in Selenium IDE
You may play a small video to see how Selenium IDE is doing the transactions automaticaly

Different Parts of Selenium IDE
Let's look into the below picture. This shows different part of Selenium IDE
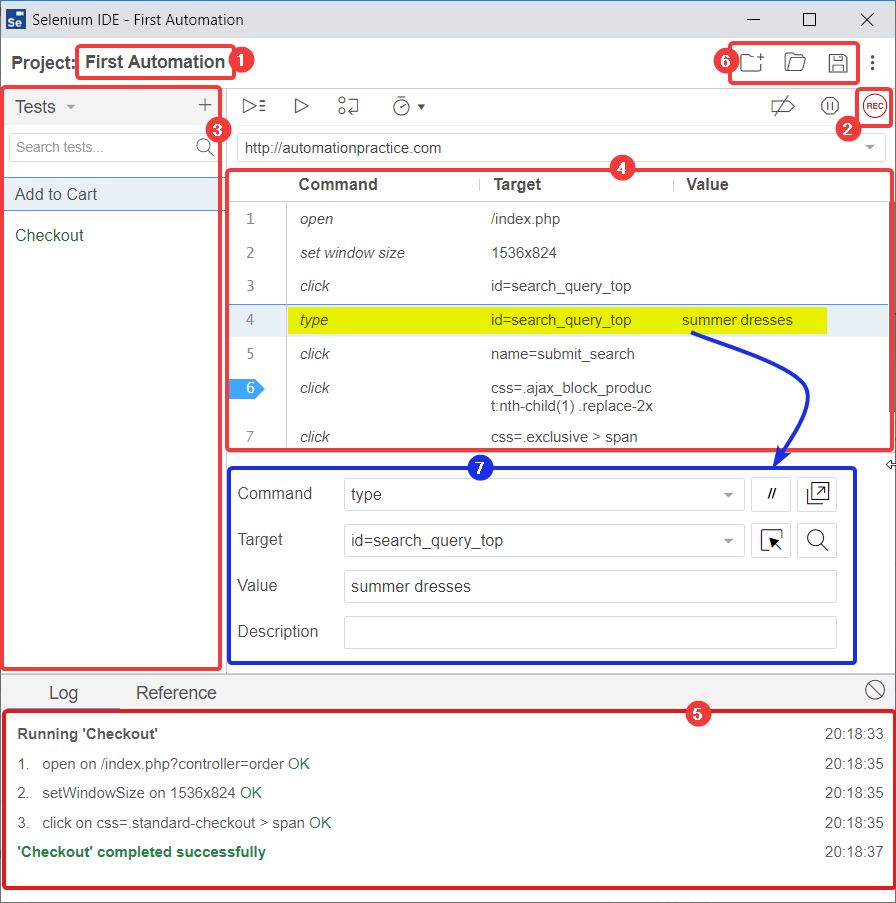
Marked numbers in the picture above are explained below
- Title of the Project
- Start and Stop Recording Button
- Test cases or Automation scripts. There might be multiple of scripts. Each scripts doing a specific short action. Each recording can be saved as one Automation Script
- Command and Argument window. This shows what Actions will be performed by Selenium in sequence. Where it will click, what will it type in a text field etc. etc
- Log and Command references. Here it shows the status of the run while an Automation is being run
- Finally the Save Button. To save the project. you can open existing project etc
- Selected Command details expanded
Customizing or Editing recorded script in Selenium IDE
In a perfect world, you just record the steps and play back, it does exactly the same thing. But, practically that does not happen. There are web pages out there that are so dynamic in nature that identity of of the elements in page might vary. Understanding of command are necessary to overcome those situation
Overview of Commands in Selenium IDE
Each step or action in Selenium IDE is a Command . Each Command is acted on a Target. Each target may have some value or you may pass on some value. Commands are used to change Windows size, changing Tabs or Window, click on some buttons or link or even typing something in a text Box on the page. Anything you can do or perform on a web page, there is a Command corresponding to that.
There are some special commands which can do something like wait for a Window to open or check if a button on a page is enabled. You need to learn the special commands, as these are not something done while recording. Recording will capture the steps that are done in sequences. But, in reality, there might be a JavaScript, that loads little later and makes a button visible. This waiting or verification cannot be done by recorder, but has to be adjusted by you.
There is a big list of commands that you car refer in the official site https://www.selenium.dev/selenium-ide/docs/en/api/commands. Anytime, you need to find out what are commands available for any task or want to know more about a particular command, this is the best place. In this article, we will focus different parts of Command and how to use it
Let's take an example Open https://www.selenium.dev/ . Here open is a command and Target is https://www.selenium.dev/
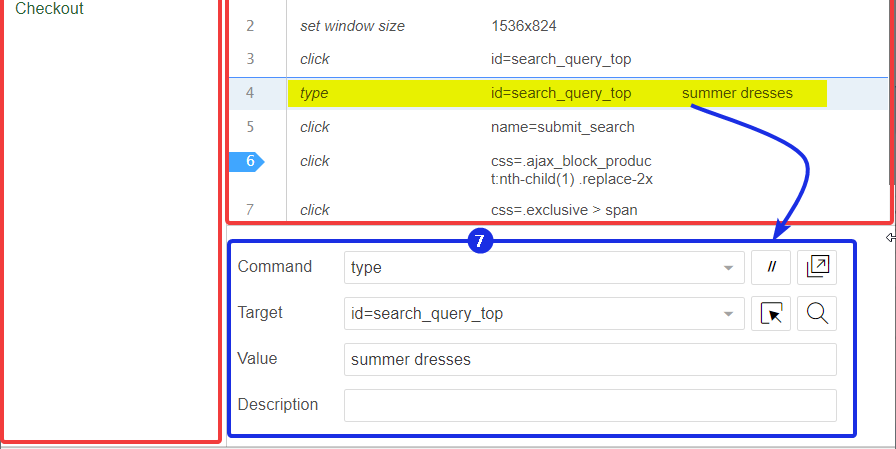
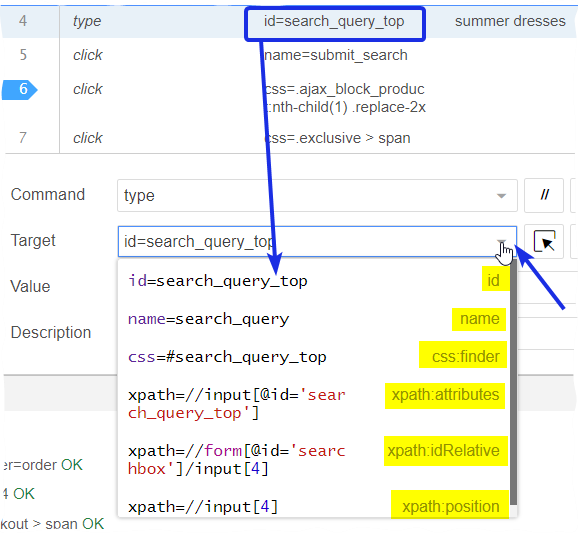
Let's take another example. In the previous picture at Step 4, the command type will type the text "summer dresses" in the search box, whose id is search_query_top
So,
- The command is type.
- What is the target? It is id=search_query_top. This means the type command is targeting to type into an element, who's id is search_query_top. The same element can be referred by it's several other ways. It can be by Name, or by Css or by XML and some other ways. Choosing the right target type is very important for success. Clicking on the Target in the Recording, as shown in the Picture below, shows by what other way the same target element can be referred. You can change it any one of them in most of the cases and it will run in the same way. You may refer to the this Article on how to find an element in a page and what type of identity should be used in different situations
- What will Selenium type in the that. This is defined in value field. in the above examples it is "summer dresses"
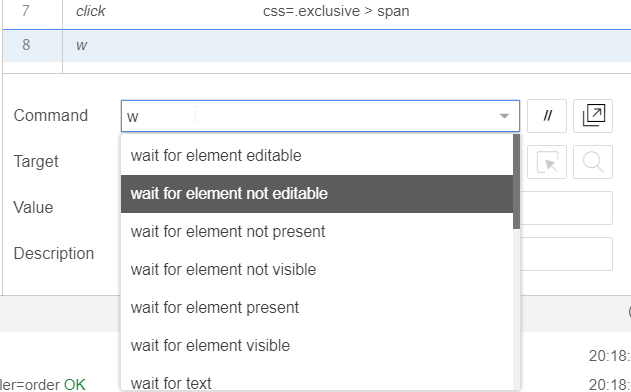
Selenium IDE also helps you suggesting probable command that you are thinking as shows it's suggestion as you type-in the command as you can see in the below example.
It does not ends there. What the command do or what the command expects from you to share additionally (for example location and then what to type in) is shown in the reference box at the bottom. To activate it, you just need to type in a partial or full command in the Command text Box and then click on the Reference. Further, whatever command you type in, It will show the similar result. Let's relate this by looking a Picture.
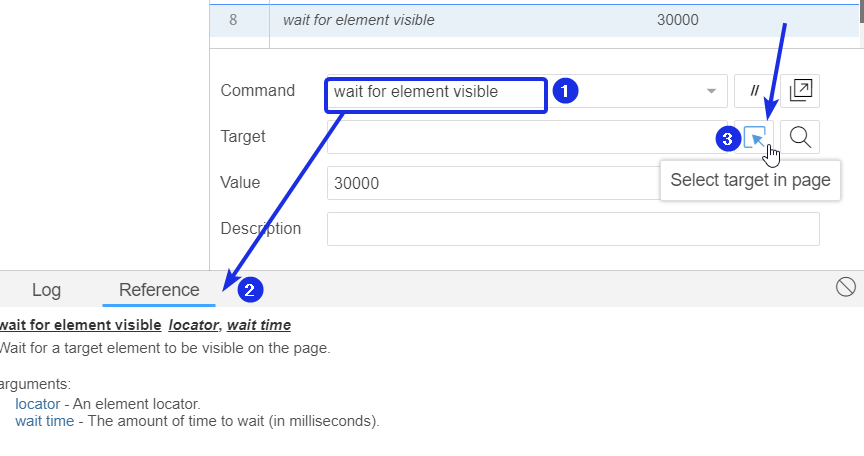
The last thing that I would like to talk about Selenium IDE is the Target. I have shared an external link on how to find an element and which type of identity to be used in different situations. But, you can also do it directly from Selenium IDE. You can click on "Select Target on page" button (marked as No. 3 in the picture) and then navigate to the browser window click on the element that you wanted to do. This will already populate the Target. You can click on the Target drop-down to select other identity of the same element.
Useful Selenium IDE Commands
Selenium IDE Commands can be categorized as :
- Actions
- Accessors and
- Assertions
Actions
As the name suggests, these are the commands that do things on page like click, type etc.
- type
- click
- click at
- double click
- double click at
- select
- select frame
- select window
Accessors
This type commands do not manipulate with the page but mostly stores value .
- store text
- store title
- store window handle
- store attribute
Assertions
These type of commands checks for some conditions, or verify that some conditions are met or wait for some specific event or value to be present on the page. There is a basic difference between assert and verify types of commands. when assert is used, the Selenium IDE will not go the next step until the condition is met, The Test case will stop if the condition fails.whereas verify will not not wait but check against the condition and move on. verify is also called a soft assert.
- assert checked
- assert alert
- assert confirmation
- assert editable
- assert element present
- assert element not present
- verify
- verify checked
- verify editable
- verify element present
- verify element not present
- verify not checked
- wait for element editable
- wait for element not editable
- wait for element not present
- wait for element not visible
- wait for element present
- wait for element visible
There are plenty of them. We will not go deep into that or start explaining the commands here in this article. you may refer to https://www.selenium.dev/selenium-ide/docs/en/api/commands. or try by typing the command in Selenium IDE and look at the Reference Tab
Export Selenium IDE Recording as program code
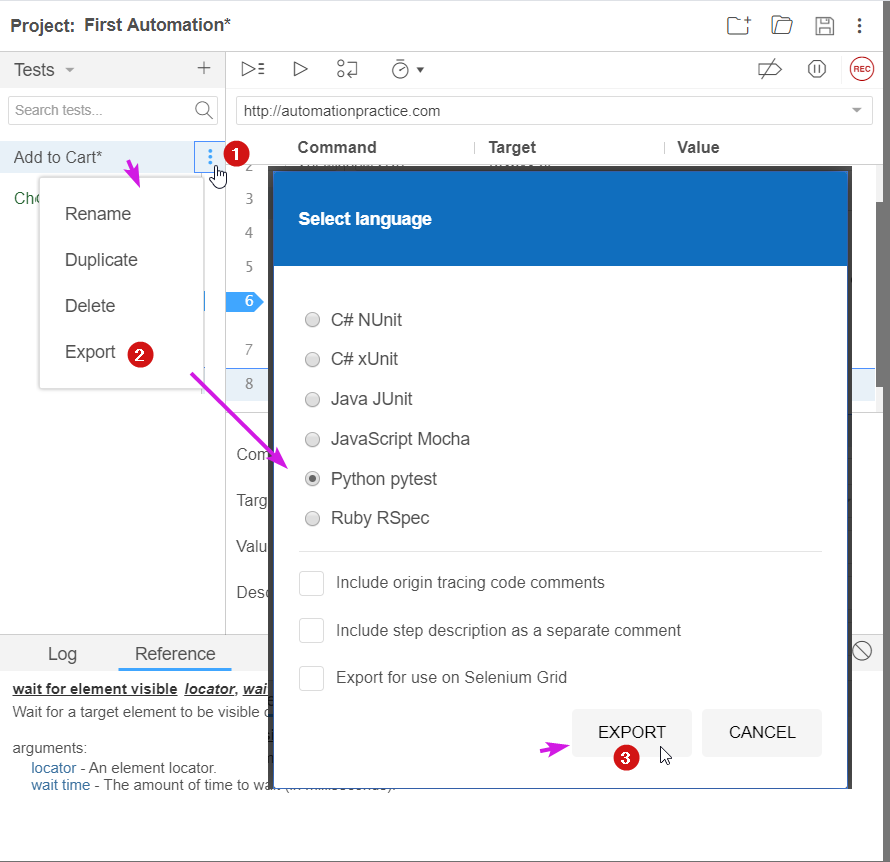
It would be unfair, if I do not create a link between Selenium IDE and Selenium WebDriver. WebDriver is used to run Selenium pragmatically, with more granular control on the flow and interaction with files or creating automated report. But it all starts with a series of commands. Selenium IDE has a feature that you can export each of the tests in selected few programming languages. These can be used as a base for working further on WebDriver. Following Picture is self explanatory on how to Export it
I sincerely hope that this article could help you to on-board in the world of Selenium